Lobster Salad with Avocado, Arugula & Grapefruit

DSC_0632

This past weekend was our 1 year wedding anniversary (yay!). We decided to have a slightly unconventional anniversary dinner party where we invited the best man and his fiance to join us for a fancy schmancy dinner at our place. The men wore their tuxes, our best man’s fiance wore the dress she wore to the wedding and I wore my gown in full regalia and it ended up being a spectacular night. We made a lobster salad, which I’ll talk about in a minute, fresh pasta with tomato sauce and a grilled pork tenderloin (in honor of the pig roast that was our reception dinner). For dessert, the top of our wedding cake – which was Carvel ice cream cake! – and Harry & David’s chocolate covered cherries paired with an awesome dessert wine. We were definitely fat ‘n happy by the end of the night and a great time was had by all.

My favorite dish (besides dessert) was this lobster salad which is a recipe my husband found on Epicurious.com. If you are a fan of lobster, you are going to *love* this. The pic below is the salad fully assembled:

DSC_0633

The pepper of the arugula paired beautifully with the sweetness of the lobster meat and the grapefruit complimented the richness of the avocado. The dressing, which is easy but must be done in advance, really pulled the whole salad together. This is definitely an “impress your guests” kind of appetizer.

For those who are local to Boston, we purchased the live lobster at New Deal Fish Market in Cambridge which is an excellent little fish shop. The arugula came form the Union Square farmer’s market.

Steamed Mussels & Clams in White Wine

DSC_0623

First let me apologize for not getting a shot of the finished product. I was somewhere between punchy and delirious around dinner time last night due to several nights in a row of bad sleep. That being said, I did still manage to crank out a decent steamed mussel + clam dish which is something that used to really intimidate me. I should admit here that I am somewhat afraid of all sea creatures – particularly the live ones – because somewhere deep inside my brain I am convinced that things which aren’t furry can’t be reasoned with. Don’t ask. I don’t know. It’s the sort of thing I categorize with my other irrational fear: clowns.

I still get kind of squeamish about handling the passive creatures, and paranoid about getting a bad one which will give us a wicked case of food poisioning. Whether or not that is rational is debatable, but it’s me so I don’t make this EASY and FAST dish nearly as much as I should. I served the steamed shellfish with a side of greens sauteed in olive oil, shallots and a splash of good red wine vinegar + salt to taste. The greens included some baby chard from our garden:

DSC_0622 You can pick the chard when it’s small like this and it’s very tender. Moreover if you start to pick off the larger leaves, the plants continue to grow and produce more of them, so you can harvest a couple times before having to replant. I also snipped a few of the beet leaves as well to add to the flavor. Aside from the chard and beat greens, the dish included some kale and some arugula.
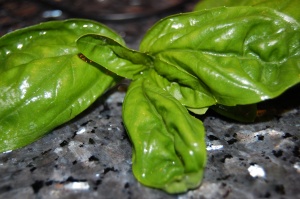
The mussels and clams were from Maine, purchased at Whole Foods and already mostly clean which was nice. I placed them both in some cold water for about 20 minutes to get off any excess sand which might be lurking. In the meantime, I assembled the ingredients for the broth:

1 leek, chopped

5-6 large garlic cloves, roughly chopped

1 pinch red pepper flakes

4-5 tablespoons olive oil

1 cup dry white wine

4-5 fresh basil leaves, chopped

4-5 chives, chopped

small handful fresh parsley, chopped

Generous pinch of salt

Start the olive oil, garlic, leeks, salt and pepper flakes in a large deep pot on medium high heat. Saute until the leeks start to soften and the garlic becomes fragrant. Add the wine and the herbs and bring the whole thing to a rapid boil. Add the shellfish and cover immediately. After 2-3 minutes, check the shellfish and give them a stir (or shake the pot to move them around. Replace the cover and continue for another 2-3 minutes. By this time most if not all of the mussels and clams will be open. You should start to remove the ones that have opened and replace the cover to cook the remaining mussels and clams until they open (shouldn’t be more than another minute or 2). Discard any unopened mussels and clams after they have been cooked for more than 7 or 8 minutes as they are likely bad.

We used tongs to remove the mussels and clams into a large bowl so that we could allow the broth to settle and any sand that was in the pot to float to the bottom. We carefully ladled off some broth for dipping the mussels & clams into a bowl and served it on the side. It is fine to do a communal bowl if you are sharing with your hubby, but if it is for other folks who might be less accommodating, ladle the broth into individual bowls along with a portion of the shellfish.

Great to serve also with some crusty bread for soaking up that yummy broth!

DSC_0620

Grilled Whole Fish + Potatoes + Mixed Greens

DSC_0524

We had another fantastic Saturday today, taking advantage of the great weather (before the strange ocean fog rolled in and cooled things off) by attending the SoWa Antiques Market which kicked off this weekend in the South End of Boston. It goes every weekend for the rest of the summer and it’s definitely worth checking out. This weekend was the opening weekend and it was also the South End’s Art Walk which was fantastic – I am always amazed by the never ending stream of talented artists that roll out in this city. 

On the way home I hit WholeFoods to grab some oysters and some other random items and came home with this looker (above) – a Strawberry Grouper. I’ve never seen this before but it looked good so I thought I would give it a shot. Since the whole red snapper I did a while back was such a success, I am feeling more confident about cooking whole fish. Additionally, we’ve been using the grill a lot more often now that the weather is good, so this meal was almost exclusively made on the grill. 

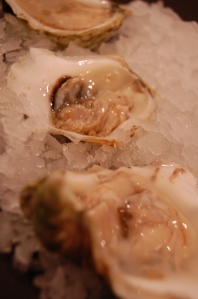
The oysters were excellent (Blue Point – wild) and we enjoyed them with some lemon juice and fresh made cocktail sauce (I like mine with lots of horseradish).

DSC_0516But on to the main attraction – a nearly 2lb whole grouper with the gorgeous strawberry color. We stuffed it with the following:
1 shallot, minced,

4-5 very thin slices of lemon

3-4 chives, chopped 

pinch of salt

And then coated the outside of the fish with olive oil before placing it on a hot grill. 

DSC_0526

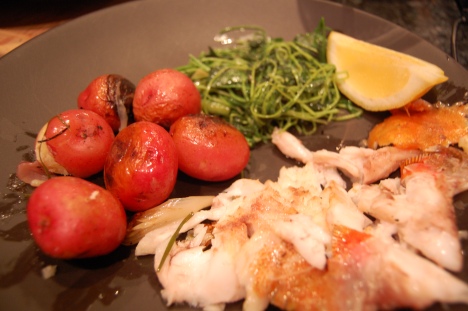
The fish takes about 25 minutes to cook all the way through on the grill, and you will want to be careful that it doesn’t stick to the grill (and then you leave fishy bits on there). Turn it about 15 minutes into it so that both sides get good and crispy. Be careful for all the little bones.  The grouper is nice and flaky and takes on good flavor from the stuffing.

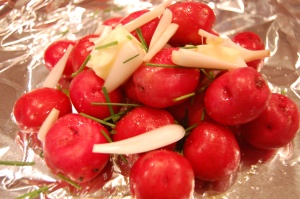
At the same time you are getting the fish together, you can grill the potatoes, at they take about the same amount of time to cook. On a large piece of tin foil (large enough to make a pouch for the potatoes) place the following:

10-12 baby red potatoes, whole

2 teaspoons of butter

1 tablespoon of olive oil

chopped chives

5-6 ramp bulbs (the white part only), sliced

pinch of salt

If you haven’t had ramps, they are like spring onions and they are only available for a short period of time. They are delicious and you can eat both the bulb and the greens. I trim the reddish part of the stem off since that is a little more bitter. 

DSC_0522

Make a pouch with the tin foil so the potatoes steam as well as get nice and caramelized on the grill. Place the pouch right onto the grill for a good 25 minutes.  The leftover potatoes make excellent hash browns the following morning – cut them in chunks and saute in a pan with some onions, your favorite spices and a touch of olive oil.

For the mixed greens – I took the greens from the ramps, some watercress, and some pea shoots and sauteed them with  a little olive oil, garlic and salt for about 3 minutes until they wilted (I browned the garlic very lightly before I tossed the greens in). 

Excellent fast and easy summer-ish dinner!

DSC_0529

Random Bag Night – Update to Shrimp Ceviche

dsc_0411

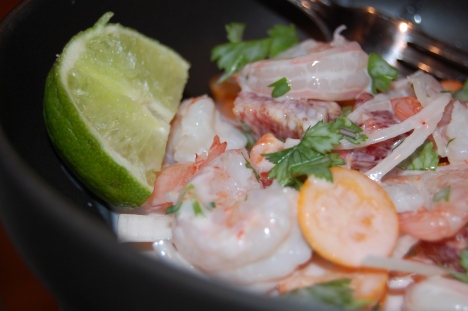
Early on in my blog I mentioned that we had taken a trip to Hawaii for our honeymoon and I returned singing the praises of Mama’s Fish House Ceviche . Last night we decided to make an impromptu appetizer version of this same ceviche using up some of the citrus that we had in the fridge. I saw a post on Slashfood yesterday about sweet and savory citrus which is where I got the inspiration last night do this. The following is what went into the bowl:

Peeled, cooked shrimp – about a dozen

2 small blood oranges, peeled and cut into chunks

5-6 kumquats, sliced

handful fresh cilantro, chopped

1/4 onion, sliced

1/4 cup light coconut milk

2 limes, juiced

pinch of salt

Hot pepper to taste

Combine all the ingredients in a bowl and allow it to sit and marinate in a bowl in the refrigerator at least an hour. The longer it sits, the better it tastes.  I served it in a bowl with some slices of lime for that extra kick. This is an excellent appetizer to serve to adventurous friends and family, it’s refreshing and delicious.

Whole Red Snapper (Asian Style) with Fresh Pan Fried Sardines as an Appetizer

dsc_0261

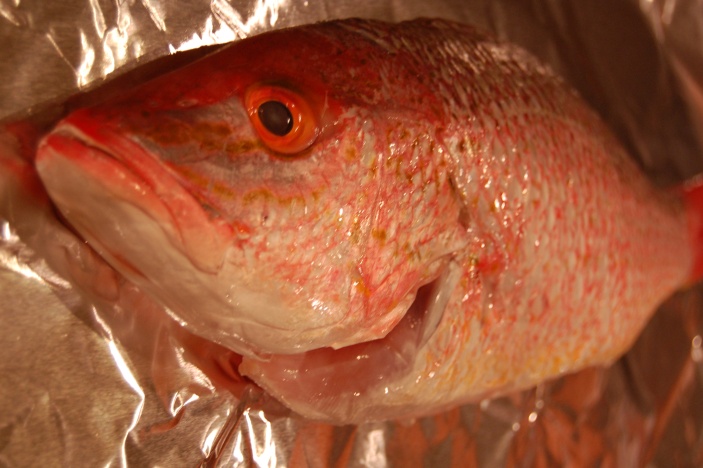
As I mentioned in our last post, we went to New Deal Seafood (www.newdealfishmarket.com) in Cambridge yesterday and picked up some fish to prepare our seafood feast. Above is the 2.5 pound whole red snapper we purchased, initially with the idea of stuffing it and baking it. Somewhere along the line we decided we were craving a more Asian style dish so after perusing the 4-5 Asian themed cookbooks we have I came up with the following recipe:

1 whole red snapper (or other favorite whole fish) – ours was 2.5 lbs

1/4 cup tamari soy sauce

3 tablespoons Thai fish sauce

1/2 teaspoon chili garlic paste (or as much Asian chili pepper as you like)

Juice of 1 whole lime

1/2 cup coconut milk

3 tablespoons of grated fresh (or frozen) ginger

5-6 scallions, chopped

2 shallots, minced

2 tablespoons olive or other veg oil

Preheat oven to 400 degrees. Take the cleaned fish and place on a huge piece of tin foil. You are going to make a packet out of the tin foil so make sure there is enough to make a loose but well sealed packet around your fish. Combine the soy sauce, fish sauce, ginger, chili, lime juice and coconut milk in a bowl. Chop the scallions and mince the shallots. Take the olive oil and rub the outside of the whole fish. Then take scallions and shallot and scatter around, under and INSIDE the fish, then pour the soy-coconut milk mixture all over the fish (also make sure to get some inside the cavity of the fish). Close up the foil pouch, making sure that all openings are sealed so that the fish essentially steams inside with this marinade. Place in the preheated oven for 40 minutes.

dsc_0263

The fish should be cooked all the way through at this point, and be very careful with all the fish bones.  The flavor is very delicate. You could make an additional dipping sauce to dial up the flavor or serve it with a 1/2 lime (as we did). As a side dish, we had fresh green beans, blanched and then sauteed with garlic and olive oil.

dsc_02691

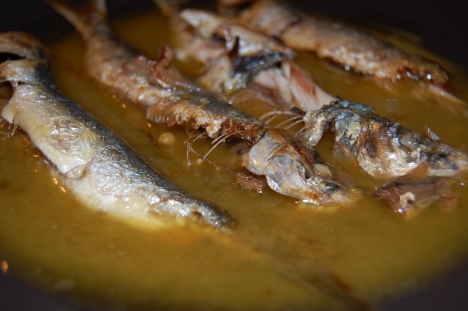
As an appetizer, my husband prepared 4 fresh whole sardines with a tasty white wine sauce adapted from The Silver Spoon cookbook. I’m not a huge fan of sardines, I think the taste is too fishy but I have to admit that this was very good. The following is the recipe as he made it:

4 whole fresh sardines, cleaned and dusted with flour

3 tablespoons olive oil

1 clove of garlic

1 fresh rosemary sprig

1 bay leaf

3/4 cup white wine

salt & pepper

Preheat the oven to 350 degrees – ours was already at 400 making the fish above, so if you are already making something else, just use that temp. Dust the sardines with flour and set aside. Place oil, garlic, rosemary and bay leaf in a sauce pan (0ne that you can transfer to the oven) and turn the heat to medium high. Brown the garlic lightly and then add the floured sardines to the pan. The idea is to brown the sardines on each side so they get a crispy coating. Remove sardines and herbs & garlic from the pan. You can discard the herbs & garlic and place the sardines on a plate. Add the white wine to the pan to deglaze it and get some of the brown bits up, reducing the liquid by half. Add sardines back into the pan and place the whole pan into the oven for 15 minutes (if oven is at 400, 20 minutes if it is at 350). Serve with your favorite crusty bread.

dsc_0265

Random Bag Night – Pasta with Tuna & Olives

dsc_0258

Yesterday was definitely inspired by the sea. My husband and I set out to run some errands in the gloriously warm weather. We headed over to the Inman Square area of Cambridge to check out some potential gifts to take to London with us this week (vacation !!) and while we were over there, my husband mentioned that he had been wanting to check out a good seafood vendor he’d heard about. We have been looking for a place to get good fresh seafood for a while. The stuff you get at Shaws and even Whole Foods is kind of meh, so boy were we excited when we entered the New Deal Seafood shop (www.newdealfishmarket.com). The staff is super friendly (seemed like there were a lot of regulars there) and extremely knowledgeable, offering tips on how to prepare their various seafood offerings. In addition, the selection was the best I have seen in the area so far in terms of freshness and variety. After debating the many options we had and convincing ourselves we didn’t have to try EVERYTHING this time, we picked up a whole red snapper and several fresh sardines. I’ll have the results of those recipes in the next post.

After we got home, we were starving so for lunch I made a quick tuna & olive pasta sauce. I don’t make this one too often, but it is tasty every now and again and we happened to have all the items in the pantry so it was easy to throw together. The cat LOVES this dish because he usually gets a little piece of tuna to nosh on while I cook. This makes enough for 2 people:

1 can tuna, preferably packed in olive oil

2/3 can of tomatoes, lightly crushed

Handful black olives, I used oil cured but Kalamata would be great too

2-3 tablespoons fresh chopped parsley

3-4 tablespoons olive oil

3-4 cloves of garlic, smashed

salt & pepper to taste

1/2 pound of linguine

Start your pasta water. In the meantime, for the sauce, place the olive oil including any excess oil from the tuna can and garlic in a pan on medium heat and let the garlic get lightly browned. Once garlic is lightly browned, add tuna and give a quick stir. Add tomato and simmer for a few minutes until the tomatoes are nice and bubbly. Turn heat to low, add olives and parsley and a pinch of salt to taste.

dsc_0256

The sauce will be done when the pasta is ready. Cook the linguine until it is al dente, and then add it directly to the pan. I don’t usually add any cheese to this dish but you can feel free to do so.  Also, you could add a little white wine in the beginning just make sure you let the sauce simmer a little longer to let some of the alcohol burn off.