Summer Fruit + Herb Salad

DSC_0601

This is a twist on your typical fruit salad and is something I love to serve with brunch. Now that the herbs are going strong in our garden, I am taking full advantage of it.  The idea is very simple – take your favorite fruits and 2-3 herbs, chop and combine. The following is what went into the photo above but you can make a much simpler combination and it works beautifully:

Apples

Strawberries

Blueberries

Raspberries

Mango

Kiwi

Pear

Mint

Chives

Cilantro

Combine the above ingredients, chopped, into a bowl and allow the flavors to mingle for a while before you serve it.  There are a myriad of combinations to the fruit and herb salad, but I would steer clear of using too strong of an herb flavor – like sage or thyme or tarragon, as it will overwhelm the fruit. Mint, cilantro, chives, parsley and basil are all good to use. You can also squeeze a lime over the salad to add additional flavor but it’s not generally necessary.

This salad is especially good spooned over some plain lowfat greek yogurt and drizzled with some honey.

I’d love to hear any favorite fruit + herb combos you’ve tried …

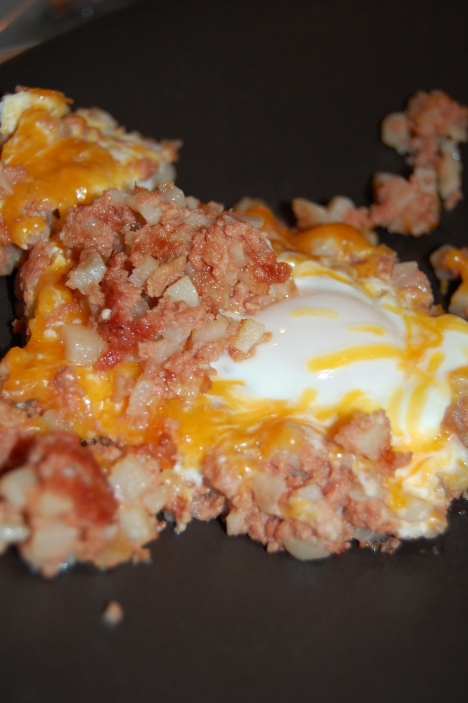
Cravings – Corned Beef Hash with Eggs + Cheese

DSC_0598

I’ve been craving corned beef hash for weeks now. No idea why, it’s been years since I”ve had it, and NO, I am NOT preggers.  When I was much younger, this was a favorite breakfast treat. It’s in no way a healthy breakfast, but it is definitely high on the satisfaction scale. It’s rich, almost creamy, heavy meaty goodness. And, it’s pretty easy. This recipe will feed 3 hungry people:

1 can Mary’s corned beef hash

3 eggs

1/2 cup shredded cheddar

Place corned beef hash into a frying pan large enough to spread it out into a layer about 1/2 inch-3/4 inch thick. Turn the heat to medium high and start to heat up the hash, stirring occasionally, for about 5-6 minutes or until it is completely warmed through. Make 3 small wells in your layer of hash, and crack an egg into each well. Top the hash with the cheddar and place a lid over the whole pan. Allow the hash to cook for another 5-6 minutes or until the eggs are cooked to your liking. The hash will get a nice crust on the bottom and the eggs + cheese just add to the delicious experience.

I like to eat this with toast or a bagel.

Olive Oil Crackers

dsc_0485

Yes, I’ve been productive this weekend – largely because my hubby is away so I have been filling my time trying stuff out in the kitchen. It’s not that I am not productive when he’s here, it’s just that I feel less bad making a huge mess when I’m home alone. There’s also been a lot of dancing around the kitchen in an embarrassing manner to my favorite songs. But anyway…

Aside from the cottage cheese I made today, I also tried out for the second time, the Olive Oil Cracker recipe from 101cookbooks.com. I like to snack at work, and I thought it might be nice (somewhat cheaper and healthier) to make myself a salty treat for the office. I’ve tried these crackers before and though they turned out OK, I didn’t make them thin enough and also didn’t add enough flour to the dough while I was rolling it out so they were kind of hard to work with.

As a word of warning, this is a very sticky & messy dough to work with since it’s also full of olive oil, but this yields some tasty crackers and you can get creative with the seasonings to make any flavor you like. I used my Kitchenaid mixer to make the dough which was super easy:

dsc_0471

The dough comes together fairly quickly and I let it rest on a plate covered in plastic wrap for about 40 minutes or so.  Depending on how you cut the dough down – in the picture at the top you can see that I did small crackers, but on the original recipe page there is a photo of larger crackers – you may want to double the batch. If you are doing the bigger ones, then probably worth it, if doing smaller crackers, just stick with the original, otherwise you’ll be there allllll day making itty bitty crackers. I know I said I had free time, but not that much.  

When it was time to roll out the dough into cracker form, I used my hand crank pasta machine. It’s important to continually dust the dough with flour as you run it through the pasta machine settings otherwise the dough will rip and be too sticky to work with. Also, I added my herbs during this portion of the process so that they would get incorporated into the dough:dsc_0480
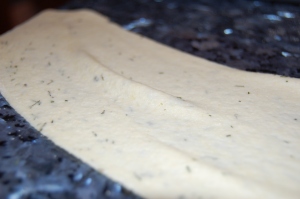
I made 2 flavors – dill with garlic salt and curry powder with garlic salt – I added the garlic salt after the dough was rolled out and ready to bake. 

To roll out the dough, its really really important to cut the ball of dough into very small working pieces. It’s a super soft dough so this makes it easier to work with. As I mentioned above, dust the dough, both sides, each time you run it through the pasta maker. I used the semolina flour for dusting. I ran each piece of dough through the machine starting on setting 6 (2x) – adding herbs here, fold your dough in half and run it through the second time), setting 5 (1x), setting 4 (1x) and setting 3 (1x).  Once it is thin enough, cut into the sizes you want and place on the floured sheet. Place your crackers in the 450 degree oven and keep an eye on them – takes about 6-7 minutes for these guys to get brown – and about 2 seconds to go from nicely browned to burnt. 

These crackers are great on their own or served with hummus or any other favorite dip.


Fresh Cottage Cheese – Really, Really Good

dsc_0476

Ree-donk-u-less. Yes, I am all getting down with my bad self for having made fresh cottage cheese this morning. This is what happens when I’ve got too much free time. I have made ricotta in the past with this recipe from 101cookbooks.com and it is also very good and very easy, but the cottage cheese I just made may trump the ricotta recipe. 

I used this recipe from Alton Brown (Good Eats) and followed it mostly to the letter. As you can see from the picture above, this isn’t the large-curd stuff you are used to buying at the store, and that is because this cheese is made without rennet, which helps the larger curds form. To make the cheese, it helps if you have one of those really heavy Le Creuset type pots to work in (both for the cottage cheese and the ricotta recipe). Also, having tea towels or cheese-cloth is a must. The thing I like about this recipe is that you use skim milk, but the end product, even before you add a little half ‘n half is just delicious and doesn’t taste low fat at all. The only bit of advice other than the pot and cloth is to slowly add the salt and definitely use kosher or large grain sea salt. You should add a good pinch, stir, and taste before adding more. 

I ate my finished product with a bunch of fresh blackberries and it was a bit of heaven. Here are some other ideas for serving this cottage cheese:

– With honey, pomegranate seeds and crushed pistachios

– Any number of fresh fruit combos + some toasted almonds

– As ravioli filling – add spinach or fresh herbs

– As a bruschetta topping – add herbs, top with sauteed mushrooms, top with roasted tomatoes, etc

Baked Beet Chips – 1st Attempt

dsc_04021

It’s spring time (almost) and of course, time to become concerned about what my waistline will look like come summer. I eat relatively well for breakfast and dinner, sometimes lunch, but where I am weak is snacking while I’m at work. After trying crispy kale I came across a recipe for beet chips. There is a fried version (too much trouble) and an Epicurious version which involves cooking the beets in sugar water first (totally unnecessary). The hardest part is getting the slices of beet thin enough and semi uniform without having a mandolin. Overall I am happy with the result, and definitely have some thoughts about how to tweak it. I started with just 1 large (HUGE) beet which took up one small cookie sheet.

1 beet

pinch of salt

parchment paper

non-stick cooking spray (I used an olive oil one)

Preheat oven to 385 degrees. Slice the beet as thin as possible, this will aid in getting the chips crispy. Fatter slices will take much longer and will probably never get really crisp (though they were still tasty). Line a cookie sheet with the parchment paper, and give the paper a light spray of the non-stick oil. Lay beets out in a single layer on top of the parchment. You can overlap the slices a little, they will shrink as they cook in the oven. Once you have laid out all the slices, spray them lightly with some of the non-stick spray and then sprinkle with salt. 

Place the tray in the oven, and cook for about 20 minutes. Will take a little less time if your oven runs hot so keep an eye on the chips, or a little longer if the slices are thicker. Once they are looking fairly done (browned, shrunken, like photo above) shut off the oven but leave the tray inside it. Remove after another 30 minutes or so, and the beet chips should be relatively crisp.

I’m thinking it would be good to experiment with adding some herbs, or some garlic salt to this recipe. I think it would add a tasty tang. My slices largely ended up too thick this time, so they weren’t crispy but still made a tasty snack so not a total loss either.

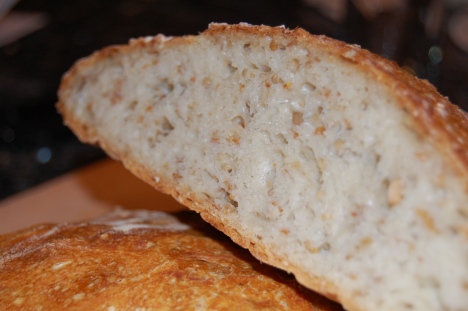
Update on no-Knead Bread recipe

dsc_0226

I know that the no-Knead Bread recipe posted by Mark Bittman on the NYTimes website has been a big hit, not only because it is easy but because it is also AWESOME. Here is the link in case you haven’t checked it out: http://www.nytimes.com/2006/11/08/dining/081mrex.html?_r=1 

Today my hubby attempted two variations on the original recipe. The first, pictured above, is the whole grain loaf made with the following ingredients added to the basic dough recipe:

1/4 cup steel oats

1/4 cup mix of sesame seeds (toasted), sunflower seeds, bulger wheat, lightly crushed

Place all the grains above into a bowl with boiling water and allow to sit for 1 hour. Drain well – important to get as much water out as possible – with a sieve and incorporate into original dough recipe.

The second variation is a rosemary lemon loaf, pictured below:

dsc_0227

For the rosemary lemon variation add the following to the basic dough recipe:

3 tablespoons dried rosemary

zest of 3 lemons

Both turned out exceptionally well, with the rosemary in the second loaf being quite strong, so you may want to scale back a little for your first try.

Enjoy!