Cavatelli From Scratch – My I-talian Sunday

DSC_1107

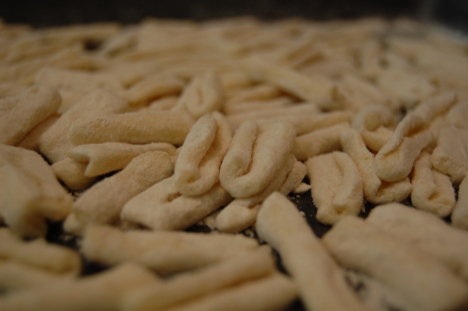
As an Italian American I am very (almost obsessively) fond of pasta. Especially the freshly made kind. I’ve shared my ravioli and gnudi making adventures in other posts and now I have embarked on a cavatelli adventure as an experiment. I’m hoping to recreate today’s success for my dad (who was born in Italy – Soveria Manelli) on his birthday because he so appreciates these kinds of things, probably even more than I do. For the un-initiated, cavatelli are almost like gnocchi but they’re made from ricotta and a lot of flour, and they have the effective sauce-catching divet in the middle (see photo above) whereas gnocchi are more like little pillows. Though versatile, I really prefer cavatelli served with a hearty meat sauce because this pasta is built to stand up to that kind of task. The homemade version is hardy without being heavy and makes for a really good Sunday meal.

Making cavatelli is easy but very labor intensive. I definitely wouldn’t attempt to make them on your own because it’s a lot of work, but this makes an excellent family bonding activity even if, like me, your family currently just consists of you and your hubby. I imagine a future time when I can do this with the help of the little bun that’s in my oven and my hubby (and a bottle of wine) and lots of good music playing.  But I digress…

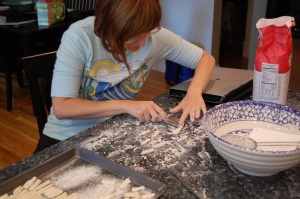
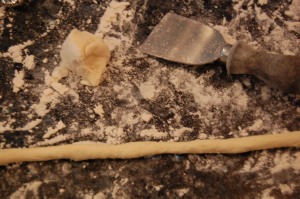
The recipe I used is here and it is an excellent one, with step by step instructions and photos. My hat’s off to the author as I didn’t need to modify a single thing. The recipe makes close to 2lbs of cavatelli.  I found that working with the dough in very small pieces was easiest, and everything had to be floured and re-floured, etc, as the dough is a bit sticky.  I used a cheese knife instead of a pastry cutter:
DSC_1097

DSC_1104The important thing is that the utensil you use for shaping the cavatelli is somewhat sharp-edged and metal – the plastic pastry cutter we have didn’t work. We allowed the cavatelli, well floured, to rest and dry out on cookie sheets for at least an hour and then half went into the fridge in a ziploc for dinner and the other half is in the freezer. It took roughly 3 full minutes for the cavatelli to cook and the result was magnificent. We made a simple tomato sauce with lamb sausage simmered in it and topped the finished dish with some grated parm. Heaven.

DSC_1101

It’s Been So Long, How About a Bowl of Lentils?

DSC_0868

For whatever reason I’ve got that “Reunited and it feels so good” song going around on repeat in my head tonight. Must be because this is the first time I’ve blogged, or even remotely felt like blogging in the last month or so. Why? Well it might be the little hormonal/life imbalance of becoming pregnant. Don’t get me wrong, I’m ecstatic about it, but it’s mostly robbed me of my desire to cook and eat. Rather strange no? Instead of having strange pickle & ice cream combo cravings I’ve found that I’ve mostly lost interest in food except as a means to quell hunger pangs and provide general nutrition to myself and more importantly the person in my belly. As someone who loved to eat beforehand, this is a somewhat devastating development. I’m hoping it’s just a “phase” and it’ll pass along with the phase that requires me to get all weepy-eyed at anything young or furry.  But I digress…. for some reason – maybe it was the copious farm share pick up or the fact that not all of our tomatoes were lost to blight this year (this year SUCKED for tomatoes in the northeast) but I actually felt like making something for dinner. AND I felt like writing about it, so here you go..

Tonight I made a kind of crazy concoction which involves Trader Joes pre-cooked lentils (I love them, so easy!) and a bunch of random stuff from our farm share and/or garden. As a side note, my doc tells me that canned food is now a no-no for pregnant and nursing moms as well as tots under the age of 2 because the cans are lined with ….BPA… yeah, I had no idea either …. so canned food is out the window for me for the foreseeable future. Good times. Here is what went into the pot:

1/2 large red onion diced

2 small fennel bulbs, sliced thin

1 carrot, diced

1 package pre-cooked lentils (approx 2 cups)

1 bunch of swiss chard, leaves only, torn into pieces

2-3 cups diced fresh tomato

2-3 tablespoons chopped parsley

1 teaspoon curry powder

1 cup of chicken broth (see my note below regarding TJ’s chicken soup concentrate)

1/2 cup white wine (don’t worry, I cook the hell out of it, there’s no alcohol left)

2-3 tablespoons of olive oil

salt to taste

Take a large sauce pan, place onion, carrot, fennel and olive oil and turn the heat to medium high. Stir often and cook for a good 5-6 minutes while the veggies get soft. Add the lentils, wine, curry powder and a pinch of salt and continue to cook on medium high heat for another 2-4 minutes. Add tomatoes, broth, and parsley. Add chard – You will have to incorporate it slowly as it wilts into the stew. Turn the heat down to medium low and allow the whole thing to simmer for another 15- 20 minutes. In the meantime, add some brown rice to your rice cooker (or cook it stove top) and serve the lentil stew over top of the rice.

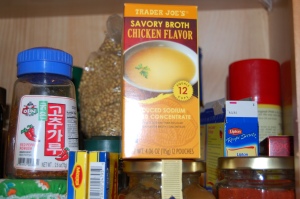
On the broth – I actually used Trader Joe’s Chicken Broth Concentrate, which is like crack if you really dig chicken soup like I do. This is THE BEST in terms of flavor I have ever had. And I make my own chicken soup from scratch on a regular basis but the flavors in this concentrate are so good, it’s unreal. Forget powdery bouillon cubes, this stuff is FOR REAL. Only downside: you need to use 1 packet for every 1 cup of water, so you go through your supply fast. I need to go back and buy out the shelf at Trader Joes. Maybe it’s the pregnancy, but this stuff is awesome:

DSC_0871

Lobster Salad with Avocado, Arugula & Grapefruit

DSC_0632

This past weekend was our 1 year wedding anniversary (yay!). We decided to have a slightly unconventional anniversary dinner party where we invited the best man and his fiance to join us for a fancy schmancy dinner at our place. The men wore their tuxes, our best man’s fiance wore the dress she wore to the wedding and I wore my gown in full regalia and it ended up being a spectacular night. We made a lobster salad, which I’ll talk about in a minute, fresh pasta with tomato sauce and a grilled pork tenderloin (in honor of the pig roast that was our reception dinner). For dessert, the top of our wedding cake – which was Carvel ice cream cake! – and Harry & David’s chocolate covered cherries paired with an awesome dessert wine. We were definitely fat ‘n happy by the end of the night and a great time was had by all.

My favorite dish (besides dessert) was this lobster salad which is a recipe my husband found on Epicurious.com. If you are a fan of lobster, you are going to *love* this. The pic below is the salad fully assembled:

DSC_0633

The pepper of the arugula paired beautifully with the sweetness of the lobster meat and the grapefruit complimented the richness of the avocado. The dressing, which is easy but must be done in advance, really pulled the whole salad together. This is definitely an “impress your guests” kind of appetizer.

For those who are local to Boston, we purchased the live lobster at New Deal Fish Market in Cambridge which is an excellent little fish shop. The arugula came form the Union Square farmer’s market.

Steamed Mussels & Clams in White Wine

DSC_0623

First let me apologize for not getting a shot of the finished product. I was somewhere between punchy and delirious around dinner time last night due to several nights in a row of bad sleep. That being said, I did still manage to crank out a decent steamed mussel + clam dish which is something that used to really intimidate me. I should admit here that I am somewhat afraid of all sea creatures – particularly the live ones – because somewhere deep inside my brain I am convinced that things which aren’t furry can’t be reasoned with. Don’t ask. I don’t know. It’s the sort of thing I categorize with my other irrational fear: clowns.

I still get kind of squeamish about handling the passive creatures, and paranoid about getting a bad one which will give us a wicked case of food poisioning. Whether or not that is rational is debatable, but it’s me so I don’t make this EASY and FAST dish nearly as much as I should. I served the steamed shellfish with a side of greens sauteed in olive oil, shallots and a splash of good red wine vinegar + salt to taste. The greens included some baby chard from our garden:

DSC_0622 You can pick the chard when it’s small like this and it’s very tender. Moreover if you start to pick off the larger leaves, the plants continue to grow and produce more of them, so you can harvest a couple times before having to replant. I also snipped a few of the beet leaves as well to add to the flavor. Aside from the chard and beat greens, the dish included some kale and some arugula.
The mussels and clams were from Maine, purchased at Whole Foods and already mostly clean which was nice. I placed them both in some cold water for about 20 minutes to get off any excess sand which might be lurking. In the meantime, I assembled the ingredients for the broth:

1 leek, chopped

5-6 large garlic cloves, roughly chopped

1 pinch red pepper flakes

4-5 tablespoons olive oil

1 cup dry white wine

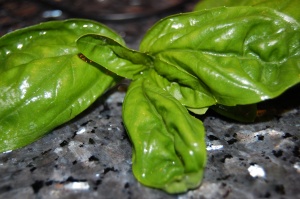
4-5 fresh basil leaves, chopped

4-5 chives, chopped

small handful fresh parsley, chopped

Generous pinch of salt

Start the olive oil, garlic, leeks, salt and pepper flakes in a large deep pot on medium high heat. Saute until the leeks start to soften and the garlic becomes fragrant. Add the wine and the herbs and bring the whole thing to a rapid boil. Add the shellfish and cover immediately. After 2-3 minutes, check the shellfish and give them a stir (or shake the pot to move them around. Replace the cover and continue for another 2-3 minutes. By this time most if not all of the mussels and clams will be open. You should start to remove the ones that have opened and replace the cover to cook the remaining mussels and clams until they open (shouldn’t be more than another minute or 2). Discard any unopened mussels and clams after they have been cooked for more than 7 or 8 minutes as they are likely bad.

We used tongs to remove the mussels and clams into a large bowl so that we could allow the broth to settle and any sand that was in the pot to float to the bottom. We carefully ladled off some broth for dipping the mussels & clams into a bowl and served it on the side. It is fine to do a communal bowl if you are sharing with your hubby, but if it is for other folks who might be less accommodating, ladle the broth into individual bowls along with a portion of the shellfish.

Great to serve also with some crusty bread for soaking up that yummy broth!

DSC_0620

Gnudi – Done well this time

DSC_0609

So you may or may not remember the first time I made gnudi and it was a spectacular failure because I didn’t add flour. After all my hard work getting the water out of the cheese and the spinach and making all the tiny balls of ricotta yumminess I watched in horror as they disintegrated about 2 seconds after hitting the boiling water. I managed to salvage the remaining batter, freeze it, and then use it as ravioli filling, so not a complete failure I guess. I have poked around online and seen the errors of my ways – needing flour – but haven’t come across a compelling recipe until now. I have recently stumbled upon the Delicious Days blog which had this outstandingly easy recipe for gnudi (or ricotta gnocchi) and I tried it out yesterday. I am so freaking excited because not only was this easy but it was FAST too and something that can be modified in many ways to produce light pillows of ricotta fabulousness. Here is the recipe converted into US measure for those of you that don’t have a kitchen scale:

1 cup ricotta

1/2 cup flour + a little extra for flouring work surface

1/3 cup parmesan

1 egg yolk

1 pinch of salt

1 tablespoon of chopped parsley (I added this for extra flavor

I followed the recipe as outlined on the DD blog, so I highly recommend having a read through there first. I combined the ricotta, with the excess water poured out (but no need to wrap it in cheesecloth and drain), with the egg yolk, cheese, salt and parmesan. Stir well so all ingredients are combined. You should start your pot of salted water boiling so it is ready to go before you add the flour.

Add the flour and just stir enough so it is combined but do not try to knead it. The dough will be somewhat wet and sticky but should stick together just fine. Take a large spoonful and place it onto your floured work surface. Roll it out into a long finger-like roll and then cut into bit sized pieces like so:

DSC_0605

Make sure you flour the surface you set them on so they are easy to remove. Once you have cut them all – and it’s important to time this well – put them right into the boiling water. Give it a stir, and watch them float to the top. It took about 3 minutes for them all to float up. Remove with a slotted spoon and add your favorite sauce. I made a crudo tomato sauce using the following ingredients:

1 14.5oz can of diced tomatoes

3-4 tablespoons olive oil

3-4 cloves of garlic

4-5 tablespoons olive oil

6-7 leaves of fresh basil

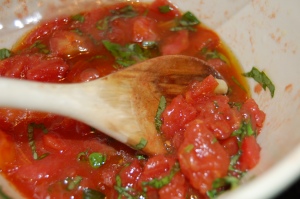
Take the garlic and cut it into smallish pieces, and saute it in the olive oil until it is light brown. Turn off the heat. Add the tomatoes to a bowl, pour over the hot oil and garlic, chopped basil and a pinch of salt to taste. Allow this mix to sit for about an hour or so – this allows the flavors to mingle. I placed the bowl in the microwave for 1 minute to heat it up before adding the gnudi.

DSC_0604

Spinach & Mushroom Pesto

DSC_0564

I have lived in Boston for about two and a half years now and every spring I get a ridiculous flu-like bout of allergies which I have never before experienced. So this is my spring hell week and it’s bad enough this time that I lost my sense of smell – which also takes with it most of your ability to taste food.  NOT fun.  But I am starting to get my sense of smell back finally today so I am celebrating by making this yummy aromatic pesto.  I got the recipe from The Kitchn which is fast becoming one of my more favorite food blogs.  I love this recipe because the garlic gets cooked, so it is less overpowering than in regular pesto, and it adds a really mellow sweetness to the dish. I tweaked it ever so slightly, and I am super happy with the results:

1/2 cup dried mushrooms

3 tablespoons olive oil

4-5 cloves of garlic, chopped

11oz spinach

1/2 cup grated parmesan

1/4 cup toasted pine nuts

1/2 teaspoon salt to taste

juice from 1/2 lemon

Add enough hot water to cover the dried mushrooms and set them aside. Place the olive oil, garlic and pine nuts in a large sauce pan – large enough to fit all the spinach into as well – and place the heat on medium high. The garlic and pine nuts should start to get lightly browned. Be sure to stir often and watch that things don’t get too brown too fast.  Once the garlic and pine nuts are toasted, add the spinach and a generous pinch of salt. Stir the spinach so it gets coated with the oil and garlic and pine nut mix and starts to wilt. After about 45 seconds, turn off the heat and continue to stir. The spinach should be mostly wilted but not completely.

Add the spinach, garlic & pine nut mix to your food processor, add the remaining ingredients (including mushrooms AND their liquid) and pulse until it is combined. Taste and see if it needs more salt or lemon.

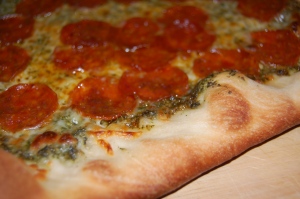
We are using this as a pizza topping tonight but it is awesome just slathered on some bread or with pasta.

DSC_0567DSC_0569