Pregnant or not, I’ve never been much of a jam eater. I haven’t got anything against jam, but it’s usually too sweet for me (yes, the person who can shotgun a box of Nerds thinks jam is too sweet) but I am sort of fascinated by the more savory variety. They make excellent additions to any cheese plate or sandwich or even just smeared on an english muffin atop some laughing cow cheese (which is what I had for breakfast today). The recipe and idea for this one came from Serious Eats, which is a really great foodie blog with all sorts of angles on the whole food thing. The best part of this recipe is that it is relatively easy, with many ingredients we had already in the house (always appealing to us lazy folk). I followed the recipe mostly to the letter but the timing listed definitely did not work out for me. I am outlining my notes below as I went through it as this is really a great recipe and worth trying but for those of you who are jam novices like me, some things to consider.
Here is the recipe.
I used a heavy enamel pot for this so that I could fit everything in and also have a shot at not scorching the whole bit and ended up with a ruined jam and worse, a ruined pot. I also started out with probably closer to 4lbs of onions. This could have been mistake #1.

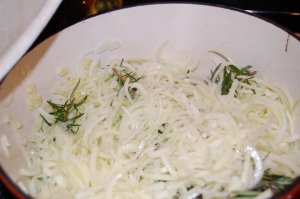
The recipe calls for 15-20 minutes of heavy sweating in the pot for the onions, rosemary, bay leaf, olive oil and salt in the pot with the lid on. Turns out it really should have been more like 25-30 minutes to really get the onions nice and soft. We’ll call this mistake #2. I think this was probably THE key mistake as the final product was a little too chunky with the onion and while still very, very yummy, it just had too much texture to it. So then I added all the vinegars, etc:
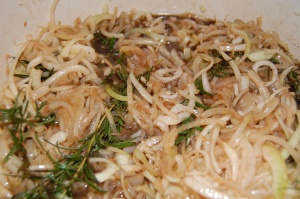
 As you can see from the picture the onions are still pretty raw and not as soft as perhaps the original recipe intended. I also (let’s call this mistake #3) upped the vinegar/wine content to account for the additional onions I used but didn’t increase the sugar or honey. Mostly I did that because as I said in the intro, I hate really sweet jams. But I also suspect this meant I short-changed myself in that gooey jammy consistency at the end with too much liquid and not enough sugars to convert to that texture we all associate with jam. Additionally, it took way longer than 15-20 minutes to get the liquid to reduce by half (more like 30-45 minutes) at which point the bay leaf and rosemary were removed and we got to this stage:
 I kept going for another 40-45 minutes before the liquid was gone and we got basically down to the consistency which is in the very top photo above. I placed it in sterilized jars, closed them and allowed them to cool before I placed them in the fridge.
The end result, as I said, was still very good and I’d happily try again with some of the things I learned on this go round and it stores for a good 2 months – longer if you follow through with the full canning process of boiling the full jars.
Filed under: Vegetarian (or easily made that way) | Tagged: jam, onion, rosemary, serious eats |


I almost always find that the time estimates in jam recipes are ‘optimistic’ at best. I often allow double or even triple the time for each step, especially when reducing, and especially because, I, like you, do not like overly sweet jams and am always cutting out the sugar, which does result in a more watery, soft-set jam, and does require additional cooking time.
Even with 3 lbs of onions though, I’m skeptical that this jam is safe to can in a boiling water bath; 3 lbs of onions, a non-acidic vegetable, to only 3/4 cup of vinegar? Doesn’t sound acidic enough to me. I’d stick with refrigerated storage if I were you.